Settings8 steps
Corporate clients and their portal
Companies with many vehicles get their own portal at your shop's address: <shop>.junto.ge/fleet. From there the fleet manager books several vehicles at once and approves extra work, and the accountant sees invoices and tells you about bank transfers. You see everything on one page.
- Owner
- Manager
- Receptionist
- Corporate client
Steps
Step 1: Open corporate clients
In the left menu choose "Corporate clients". The list shows each company's vehicles, the amount to invoice this month, debt, payment terms and any requests waiting.
Step 2: Add a company
Click "Add company" and enter the "Company name", "Tax ID", contact person and phone, and "Email for invoices". Choose the "Payment terms": "Per visit" or "Monthly invoice" with the net days. Click "Add company".
Step 3: Add the fleet
On the company page, in the "Vehicles" tab, click "Add vehicle" for each vehicle. The table shows plate, model, mileage, driver and when the next service is due.
Step 4: Give the company's people a portal
In the "Users" tab click "Add user", enter the name and mobile number and choose the role: "Fleet manager", "Accountant" or "Driver" (give a driver their vehicle). The invitation is sent by SMS.
Step 5: The company signs in to the portal
The "Client portal" link shows you the portal address. The company's person enters their mobile number, taps "Get the code" and signs in with the SMS code; no password is needed.
Step 6: The manager sends a request
The fleet manager opens the "Book" tab in the portal, picks one or more vehicles, the services and a "Preferred day", writes a comment and taps "Send request". The portal also shows them an estimated price.
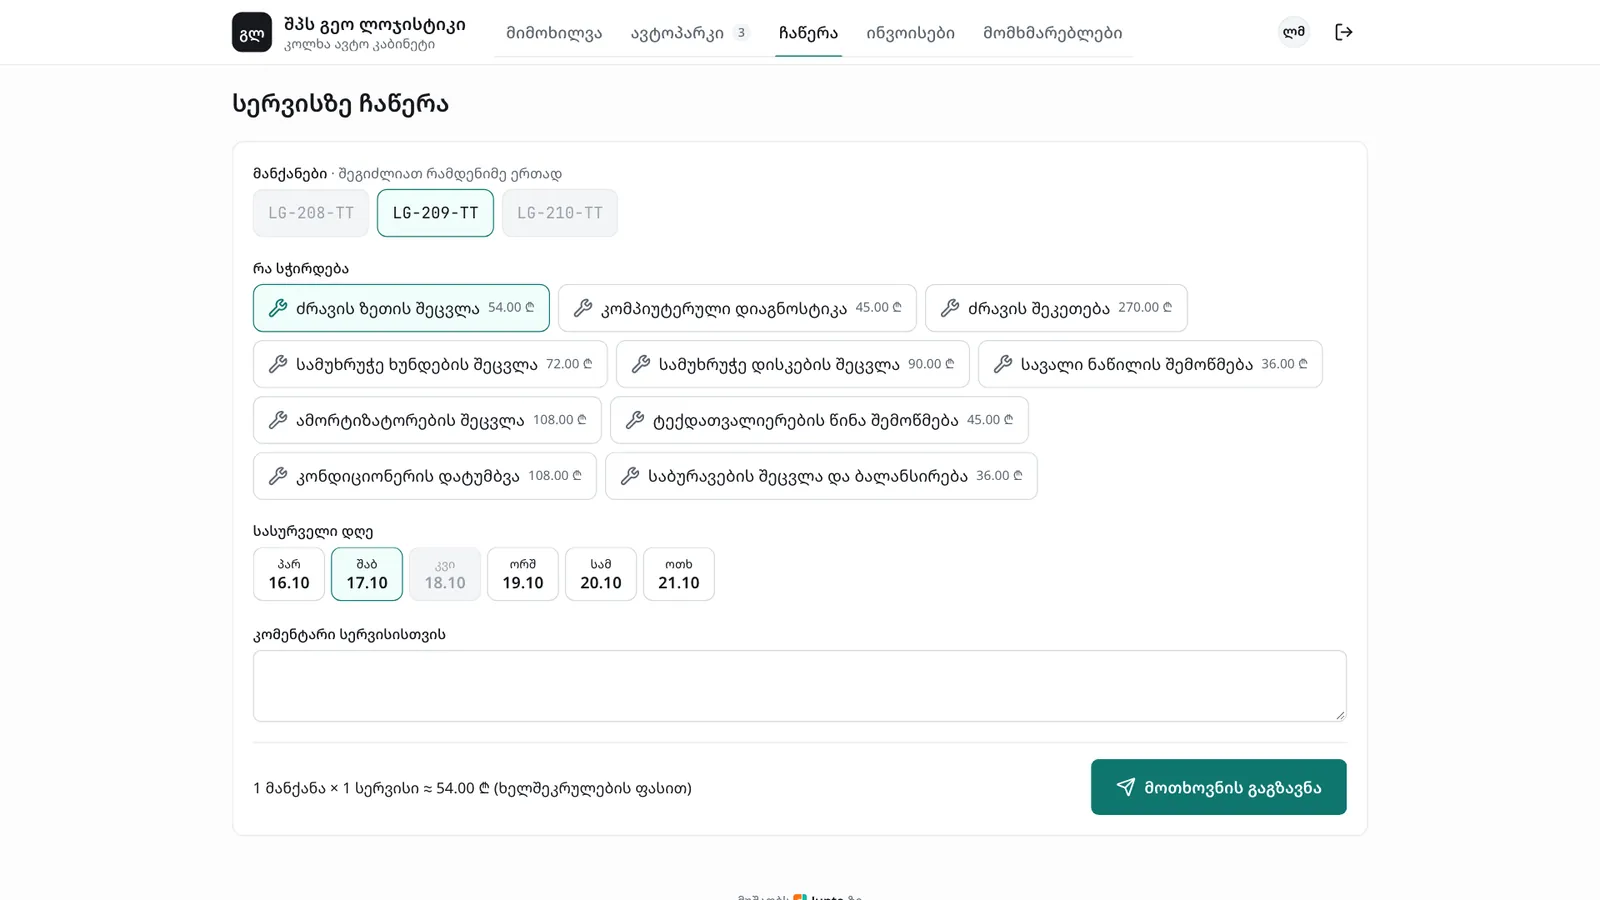
Step 7: Confirm the request
A waiting request appears in the companies list. Open the company, go to the "Requests" tab and click "Confirm". Choose the branch and a time for each vehicle; the bay is picked automatically. Once confirmed, the appointments appear in the calendar. If you cannot take them, click "Decline" and give a reason.
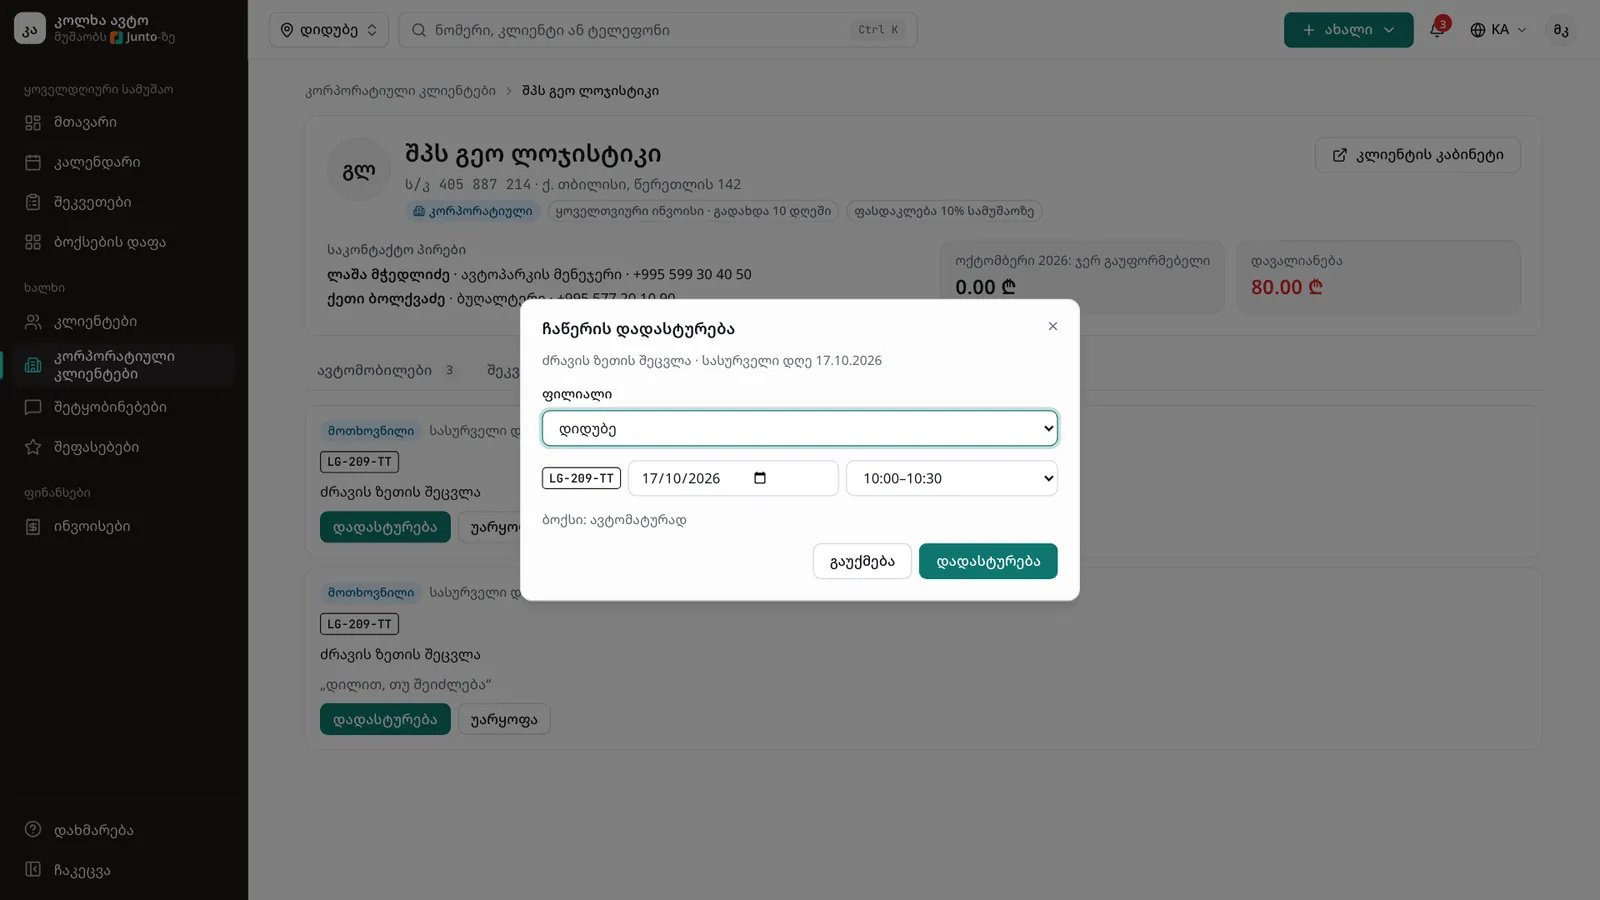
Step 8: Confirm a bank transfer
When the accountant marks "Paid by transfer" in the portal, the transfer appears in the "Billing" tab. Once you see the money in your account, click "Confirm" and the payment is recorded on the invoice; if not, click "Reject".
Tips
- When you send extra work on a company vehicle's order for approval, the fleet manager also sees it in the portal and can approve it there.
- Company user roles: the fleet manager can do everything except pay invoices, the accountant sees invoices and payment, and a driver sees only their own vehicle's status.
- Reception sees corporate clients and confirms their requests, but cannot add a company or change its terms.
- If the menu item is missing, check that the "Fleet portal" module is on.
Related guides
- A new appointment in the calendarHow to book a customer into the calendar during a phone call: customer, car, services and time in one window.
- Sending extra work for approvalHow to price a problem the mechanic found and send it to the customer by SMS for approval.
- Invoice and taking paymentHow to create an invoice from a work order, take payment in cash, by card or by bank transfer, and print the invoice.
- Customer approval on the phoneWhat the customer sees from the SMS link: the problem found with a photo and price, "Approve" or "Decline" on each item, and the new total.
- A new customer and their carHow to add a new customer and their first vehicle in one window, for example for a walk-in without a booking.