Bookings and check-in6 steps
A new customer and their car
When a new customer walks in without a booking, you add them and their car first. One window takes the name, phone and first vehicle, and from the customer's page you then start an appointment or a work order straight away.
- Owner
- Manager
- Receptionist
Steps
Step 1: Open the add customer window
In the top bar, click "New" and choose "Customer". Or open "Customers" in the left menu and click "Add customer".
Step 2: Choose the customer type
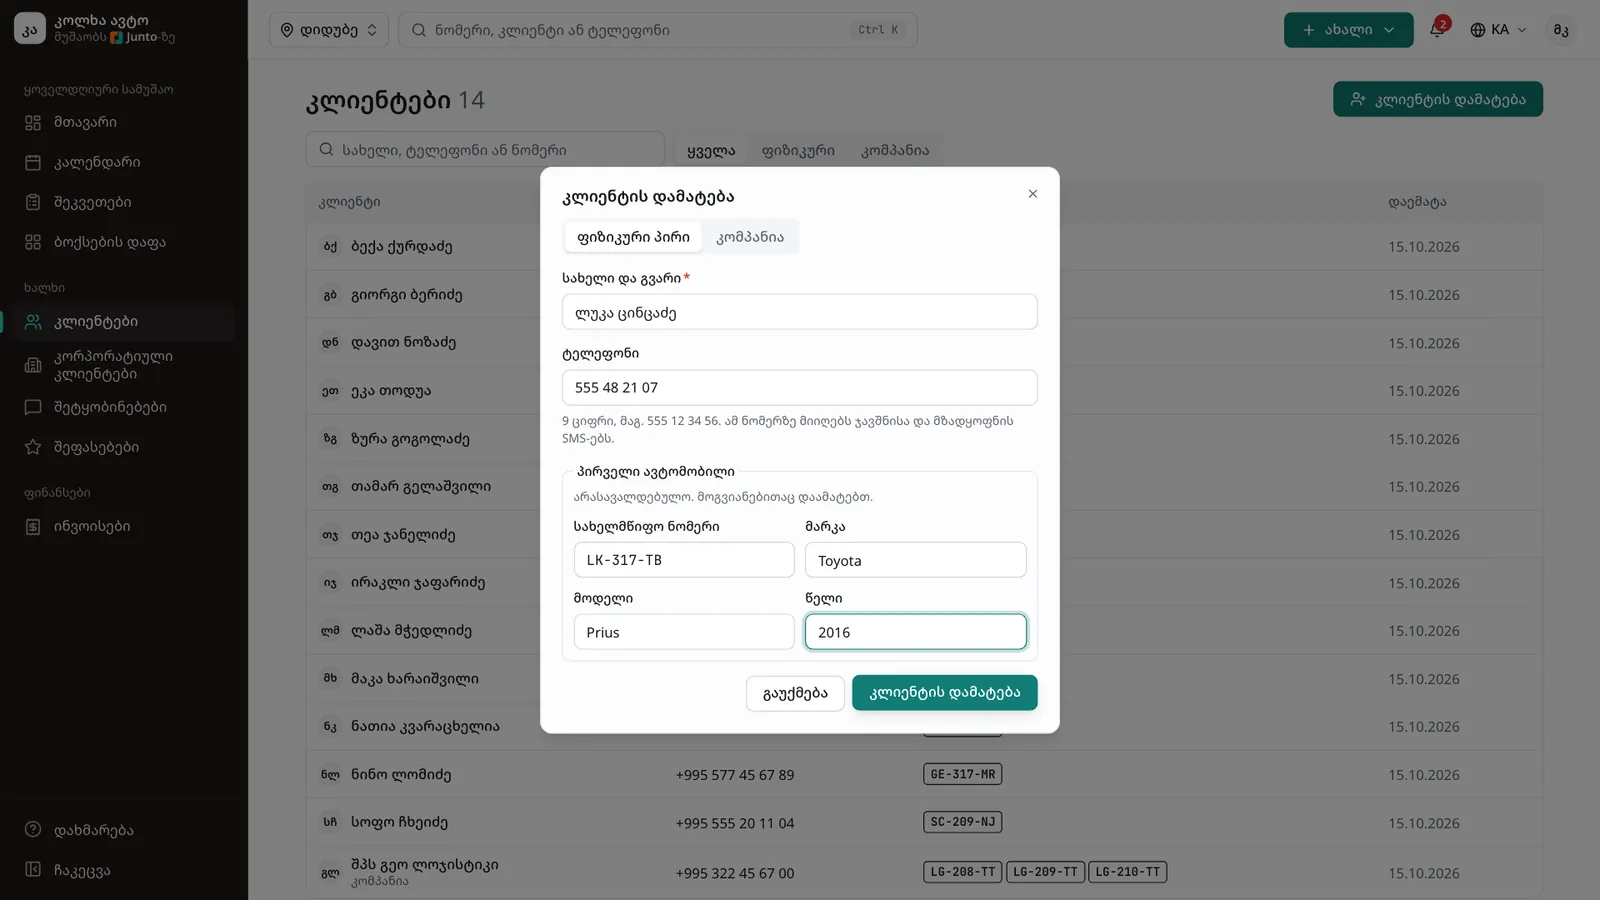
At the top, choose "Individual" or "Company". For a company the name field is called "Company name".
Step 3: Enter the name and phone
Fill in "Full name" and "Phone" (9 digits, e.g. 555 12 34 56). Booking and ready-for-pickup SMS go to this number. If a customer with this number already exists, an "Open the existing one" link appears.
Step 4: Add the first vehicle
Under "First vehicle", enter the "Licence plate" (e.g. QK-482-LT), "Make", "Model" and "Year". This part is optional; you can add the car later.
Step 5: Save the customer
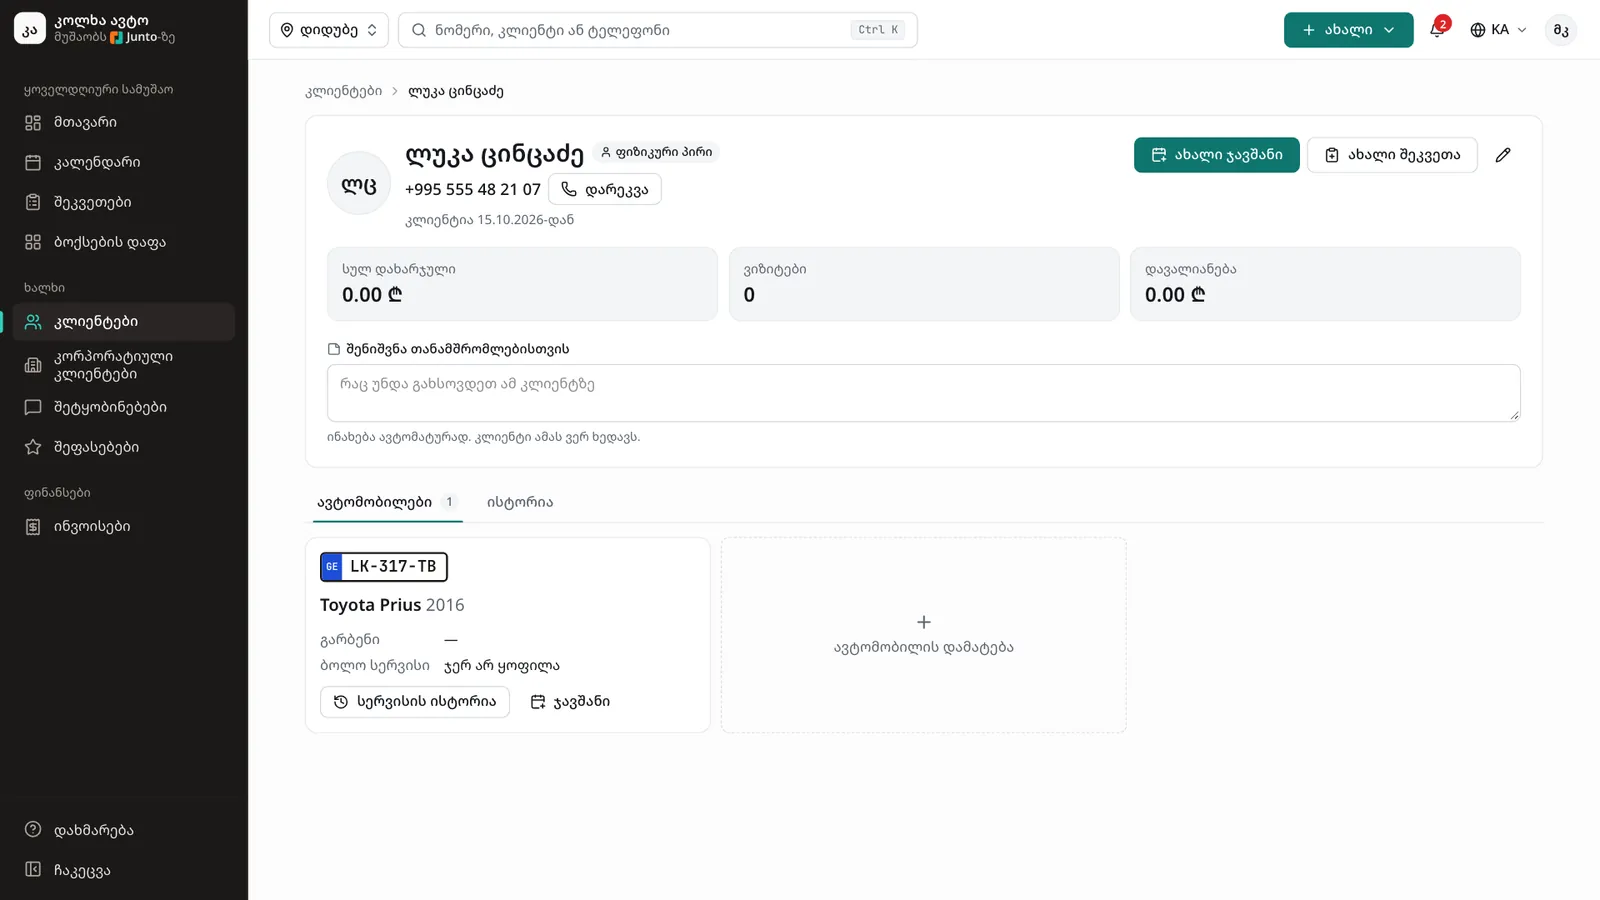
Click "Add customer". "Customer added" appears and the customer's page opens with their car.
Step 6: Carry on from the customer's page
If the customer is in the shop now, click "New work order" to start checking the car in. For a later visit, click "New appointment". For another car, click "Add vehicle" on the "Vehicles" tab.
Tips
- Search in the customer list works by name, phone number and plate.
- The "Note for staff" field on the customer's page is saved automatically and the customer never sees it.
- You can also add a new customer right inside the appointment window, with "New customer".
Related guides
- A new appointment in the calendarHow to book a customer into the calendar during a phone call: customer, car, services and time in one window.
- Checking a car inHow to check a car into the shop: mileage, fuel, photos, damage, the complaint and the customer's signature.
- Customer and car historyHow to see all of a customer's visits, what they spent and what they owe, and a car's service history, photos and mileage.