Money9 steps
Expenses, payroll and timesheets
Three pages under "Finances" in the menu show together what it costs to run the shop. "Expenses" keeps rent, utilities and other bills, "Payroll" works out what each person is owed, and "Timesheets" shows the hours counted by the mechanics' timers. These figures also feed the profit report.
- Owner
- Manager
Steps
Step 1: Open expenses
In the left menu, under "Finances", choose "Expenses". On the left you see the month's total and bars by category, on the right the list of entries. At the top are the "Period" and "Category" filters.
Step 2: Add an expense
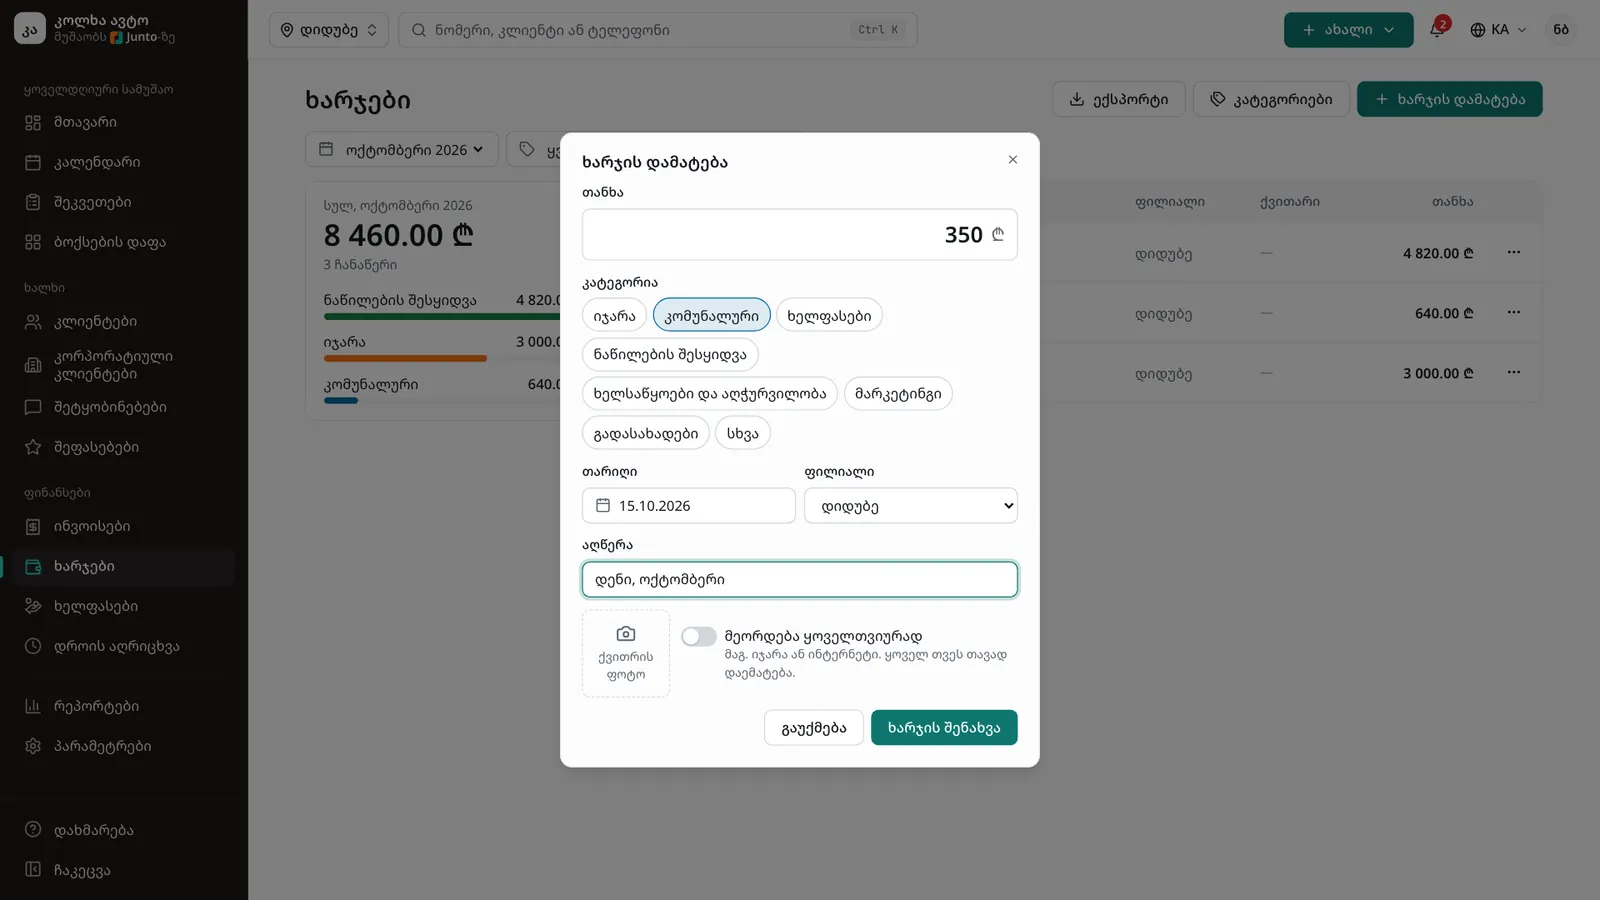
Click "Add expense", enter the "Amount", choose the "Category", "Date" and "Branch", add a "Description" and, if you have one, a "Receipt photo". For costs like rent or internet turn on "Repeats every month": it will be added by itself every month. Then click "Save expense".
Step 3: Download and manage categories
"Export" downloads the month's expenses as a CSV file. The owner also has a "Categories" button to add or delete categories. Expenses of a deleted category move to "Other".
Step 4: Open payroll
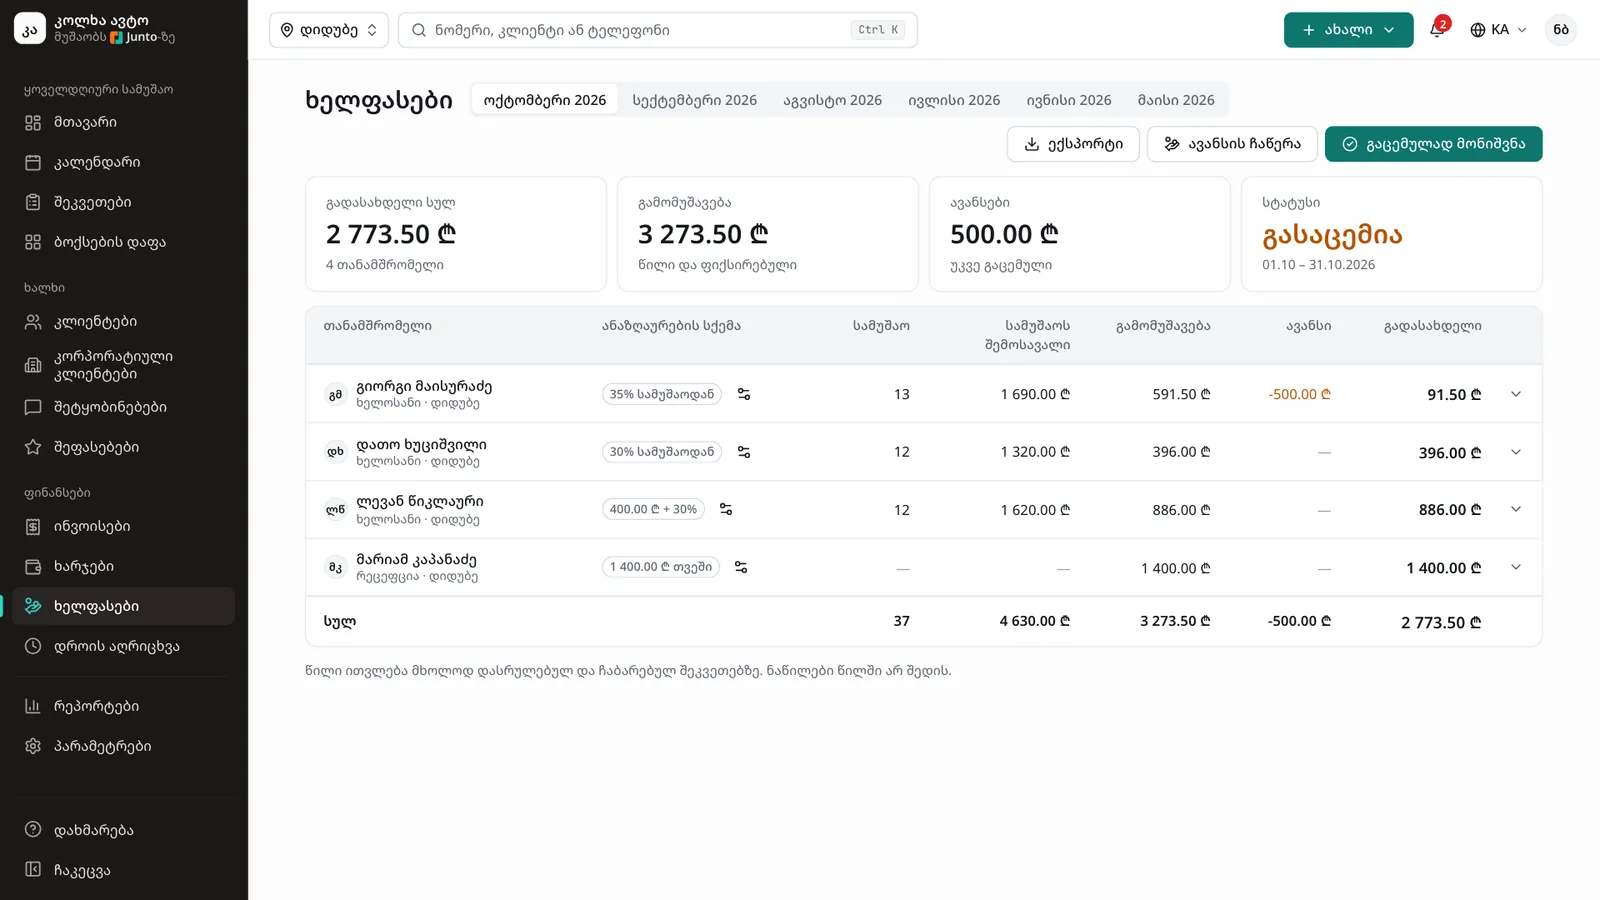
Choose "Payroll" and pick the month at the top. The cards show "Total to pay", "Earned", "Advances" and "Status". The table has one row per staff member; click a row to see which jobs their share came from.
Step 5: Set the pay scheme
In a staff member's row click "Change scheme" and choose "Share of labour", "Fixed salary", "Fixed and share" or "Hourly". Enter the percentage or amount and click "Save scheme". The new scheme also applies to the current month's figures.
Step 6: Record an advance
If you paid someone during the month, click "Record advance", choose the staff member and enter the amount and date. The advance is subtracted from this month's pay.
Step 7: Mark the month as paid
Once you have paid the salaries, click "Mark as paid" and confirm. The month closes for every branch, and an expense "Salaries" with the month's total is added automatically.
Step 8: Check the timesheets
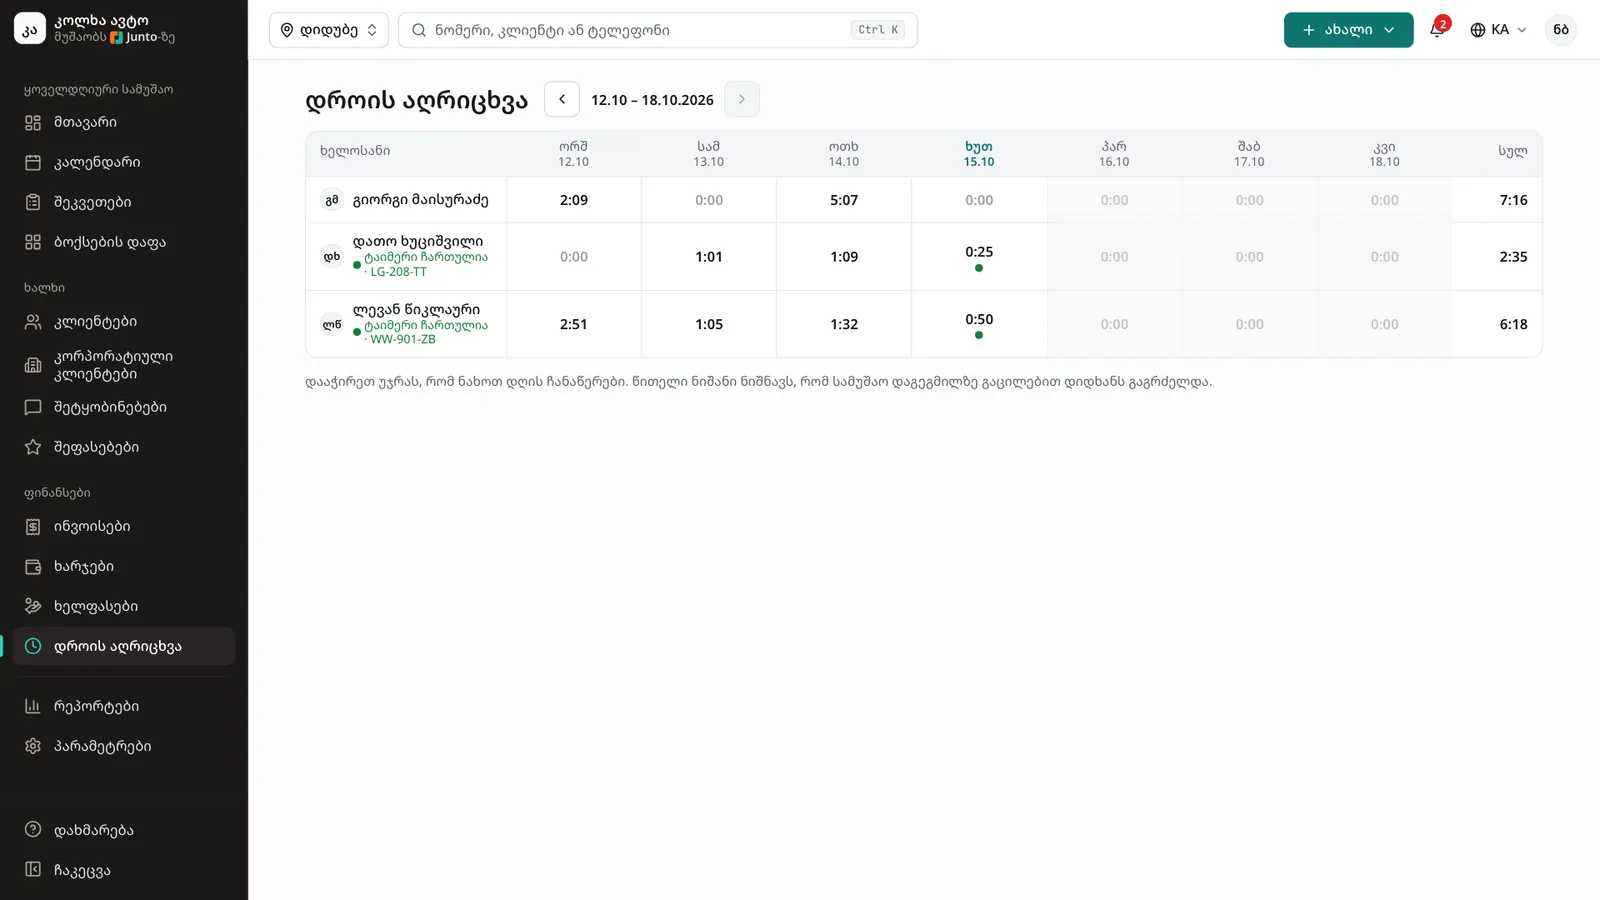
Choose "Timesheets". The grid has one row per mechanic and a column per day; "Previous week" and "Next week" change the week. A red mark means a job ran much longer than planned.
Step 9: Correct an entry
Click a cell to see that day's entries. "Edit" changes the start and end time, "End at 18:30" closes a timer left running overnight, and "Add entry" adds work that was forgotten. The mechanic sees the change too.
Tips
- Only the owner sees payroll. The manager sees and adds expenses and corrects timesheets, but cannot change the categories. Receptionists do not see these pages.
- The share counts only finished and delivered orders. Parts are not included.
- The "Hourly" scheme uses the mechanic's timer, so check the timesheets before you mark the month as paid. A closed month cannot be reopened.
- If these pages are missing from the menu, check that the "Expenses and payroll" module is on.
Related guides
- Reports and the profit reportHow to see revenue, popular services, mechanic results and profit for any period, and how to download them as a CSV file.
- Adding staff and rolesHow to add a staff member to Junto, give them a role and a branch, change their password or turn them off.
- The bay boardHow to follow the workshop on one screen: who is in which bay, how long they have been working and which car is ready.
- Invoice and taking paymentHow to create an invoice from a work order, take payment in cash, by card or by bank transfer, and print the invoice.
- The Junto apps for car owners and mechanicsWhat the car owner app does (booking, order status, approval, payment, garage) and what the mechanic app does (jobs, timer, check-in, hours).